Follow Me On Social Media!
fried chicken recipe
Hey there, fellow food lovers! I’m Bella, and I’m about to share something special with you. After years of perfecting my technique and countless kitchen experiments (some more successful than others), I’ve cracked the code to the perfect fried chicken recipe.
This isn’t just another recipe floating around the internet. This is your complete roadmap to crispy, juicy, restaurant-quality fried chicken that’ll have your family and friends begging for seconds. We’re diving deep into the science, the secrets, and the step-by-step process that transforms ordinary chicken into something extraordinary.
Ready to become the fried chicken master in your kitchen? Let’s get started!
The Science of Sensational Fried Chicken
Before we jump into the how to make fried chicken, let’s talk about the why. Understanding the science behind great fried chicken will make you a better cook, I promise.
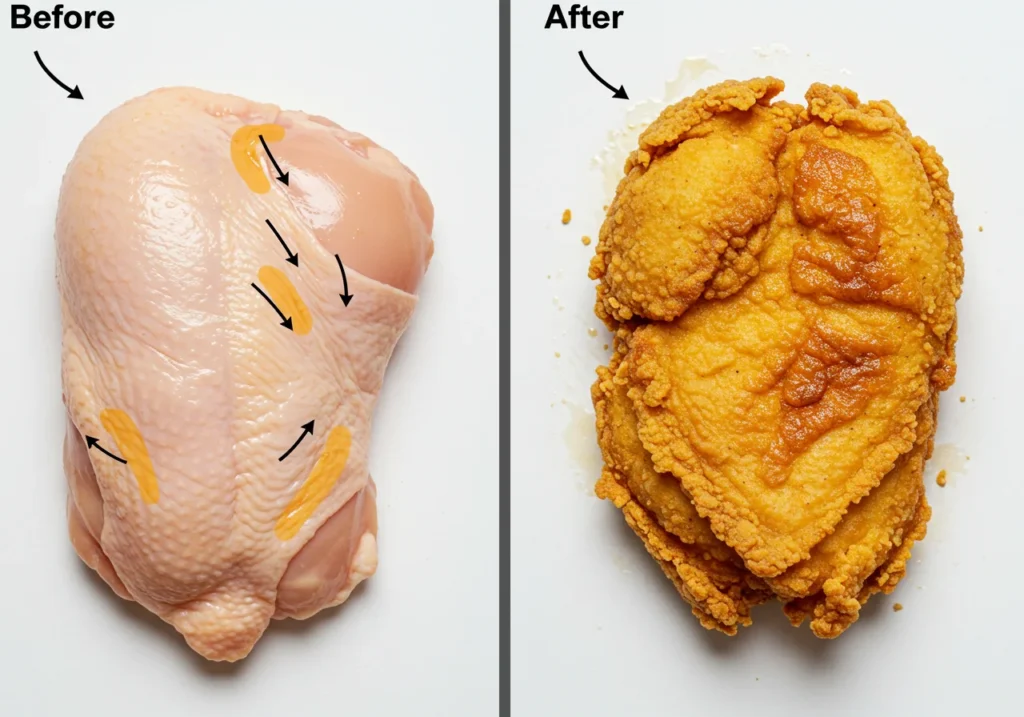
The Maillard Reaction is your best friend here. This magical process happens when proteins and sugars in the chicken react to heat, creating that gorgeous golden-brown color and incredible flavor we all crave. It’s why properly fried chicken tastes so much better than baked alternatives.
Fat rendering is equally important. As your chicken cooks, its own fat renders out, essentially helping to fry itself from the inside. This is why skin-on pieces often turn out crispier than skinless ones.
The gluten development in your breading matters too. Some recipes call for a splash of vodka or beer in the batter because alcohol evaporates quickly, leaving behind a lighter, crispier crust. Pretty cool, right?
Choosing Your Chicken: The Foundation of Flavor
Not all chicken pieces are created equal when it comes to frying. Here’s what you need to know:
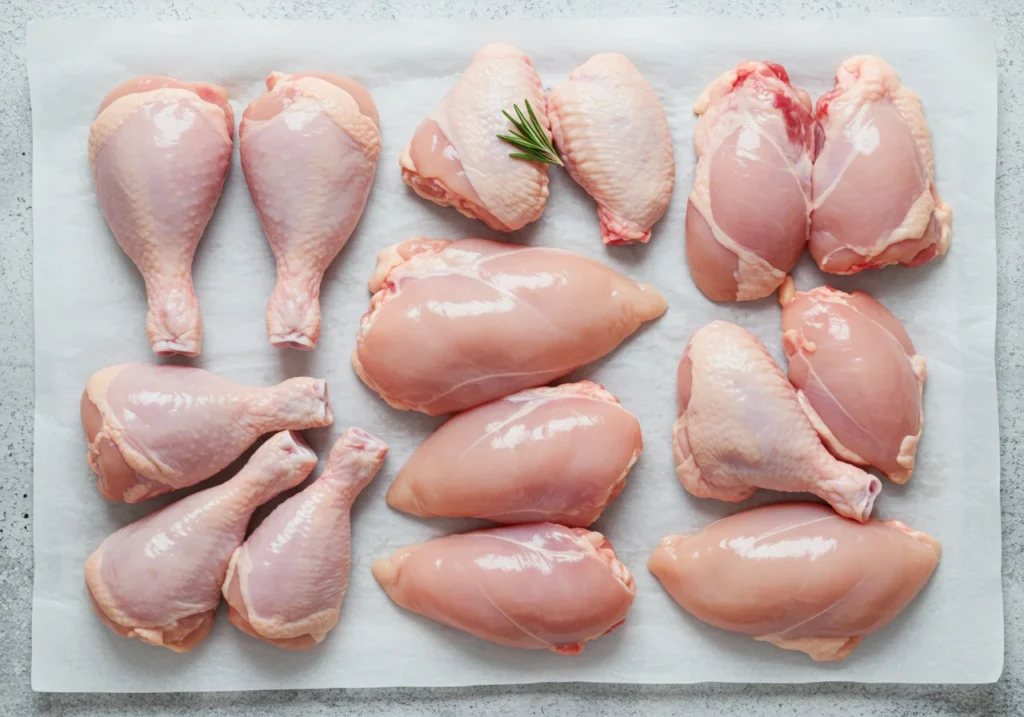
Best cuts for frying:
- Thighs: My personal favorite! They stay juicy and are nearly impossible to overcook
- Drumsticks: Great for kids and perfect for parties
- Wings: Quick-cooking and crowd-pleasers
- Breasts: Trickiest to get right, but worth it when you nail it
Bone-in vs. boneless? Bone-in pieces take longer to cook but stay juicier. The bone actually helps conduct heat, cooking the meat from the inside out. Boneless pieces cook faster but require more attention to avoid drying out.
When sourcing your chicken, quality matters. Fresh, never-frozen chicken typically gives better results, and if you can find air-chilled birds, even better!
The Brine: Your Secret Weapon for Juicy Chicken
Here’s where we separate the good from the great. Brining isn’t optional in my kitchen – it’s essential for this easy fried chicken recipe.
Wet Brine vs. Dry Brine:
- Wet brine: Chicken soaks in a salt-water solution, absorbing moisture and flavor
- Dry brine: Salt is applied directly to the chicken, drawing out moisture initially, then reabsorbing it with concentrated flavor
I prefer wet brines for fried chicken because they’re more forgiving and consistently deliver juicy results.
Our Recommended Buttermilk Brine Recipe
Ingredients:
- 4 cups buttermilk
- 1/4 cup kosher salt
- 2 tablespoons brown sugar
- 2 teaspoons paprika
- 1 teaspoon garlic powder
- 1 teaspoon onion powder
- 1/2 teaspoon cayenne pepper
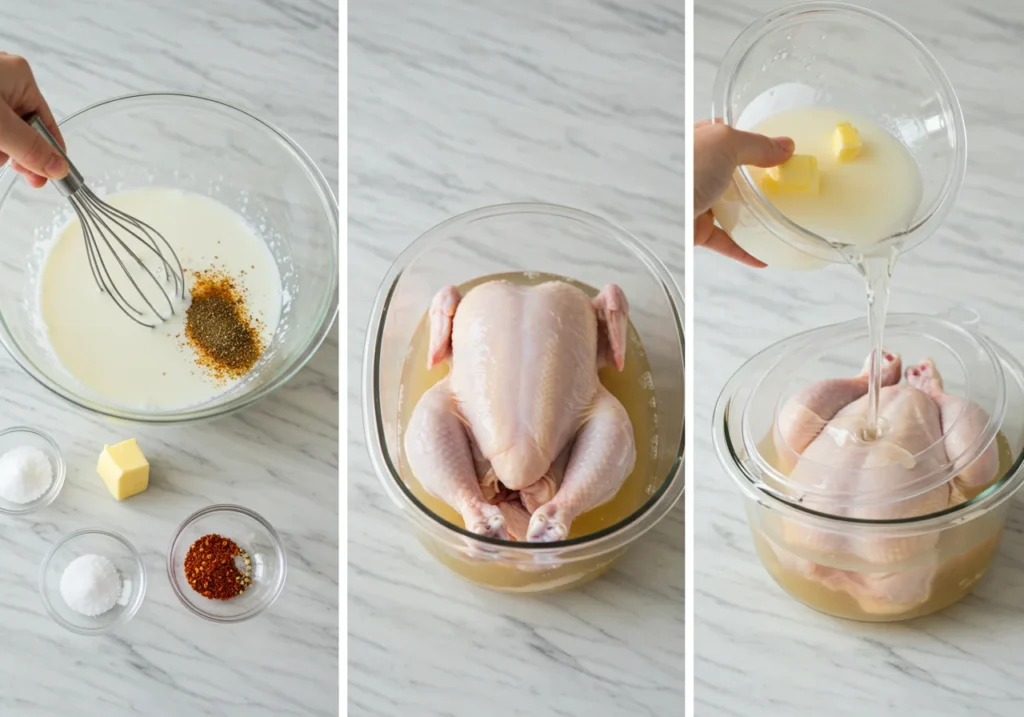
Mix everything together and submerge your chicken for 4-24 hours. The acids in buttermilk tenderize the meat while the salt ensures every bite is seasoned perfectly.
Alternative brines to try:
- Pickle juice brine: Use dill pickle juice for tangy, Southern-style flavor
- Sweet tea brine: Perfect for a subtle sweetness that pairs beautifully with spicy heat
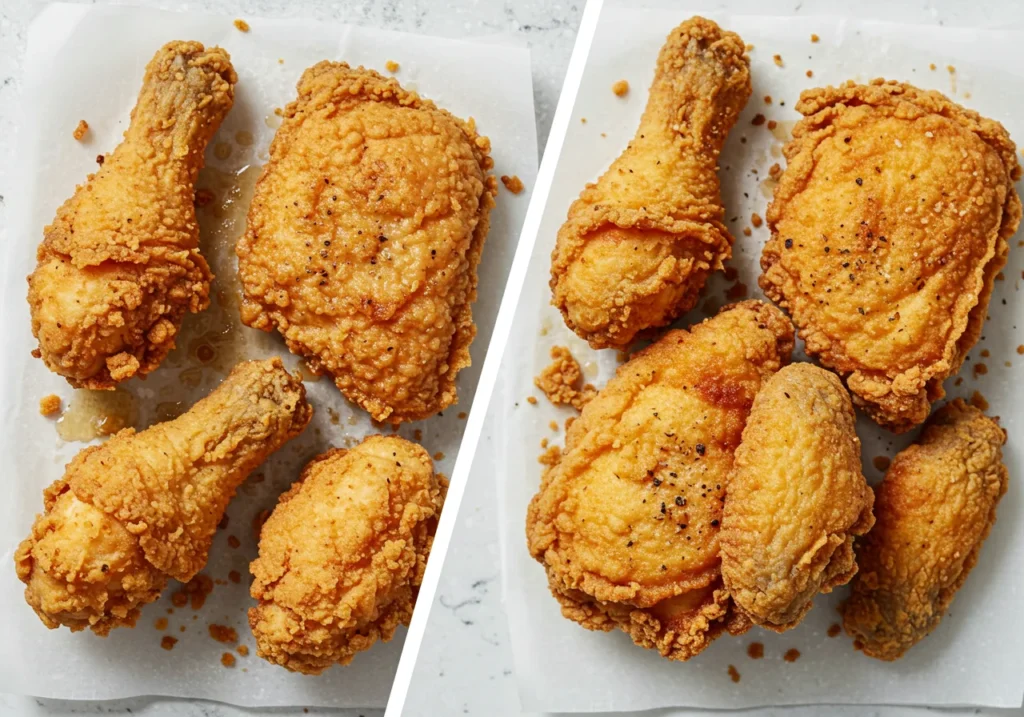
The Dredge: Creating the Perfect Crispy Crust
The coating makes or breaks your fried chicken. Here’s how to get it right every time.
Flour power breakdown:
- All-purpose flour: Your base – provides structure
- Cornstarch: Adds extra crispiness (use about 1/4 cup per 2 cups flour)
- Baking powder: Creates tiny air bubbles for a lighter texture
Our Signature Seasoning Blend
Ingredients:
- 2 cups all-purpose flour
- 1/4 cup cornstarch
- 1 tablespoon salt
- 1 tablespoon paprika
- 1 teaspoon garlic powder
- 1 teaspoon onion powder
- 1 teaspoon black pepper
- 1/2 teaspoon cayenne pepper
- 1/2 teaspoon baking powder
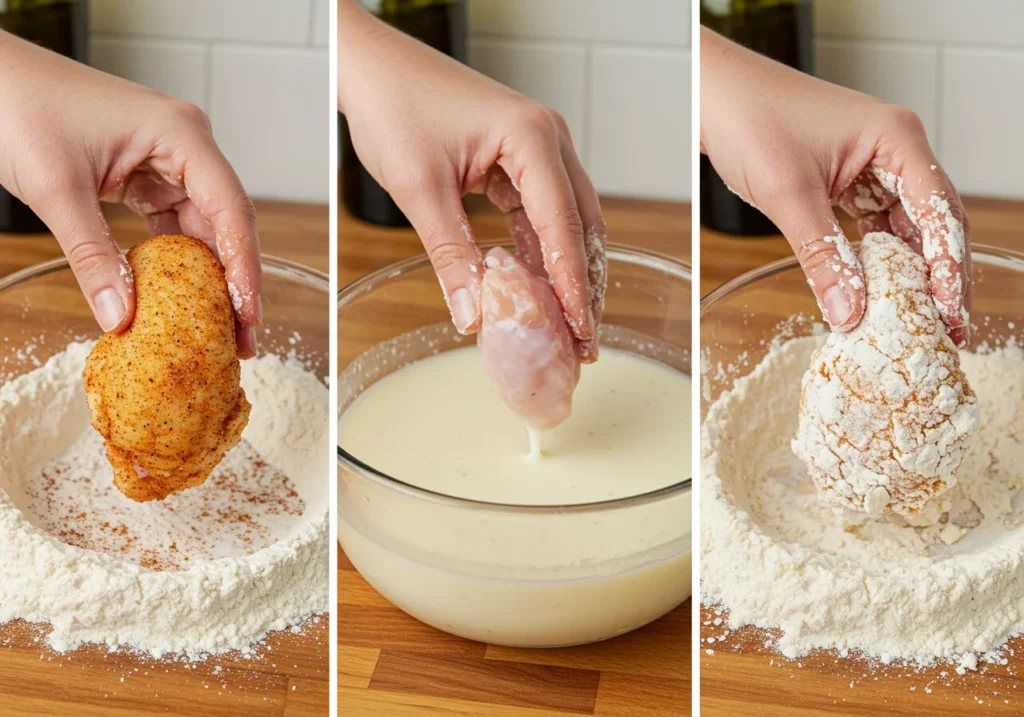
The double-dredge technique:
- Dredge chicken in seasoned flour
- Dip back in buttermilk brine
- Dredge again in seasoned flour
This creates more surface area and texture for maximum crunch. Don’t skip this step – it’s what separates good fried chicken from extraordinary fried chicken!
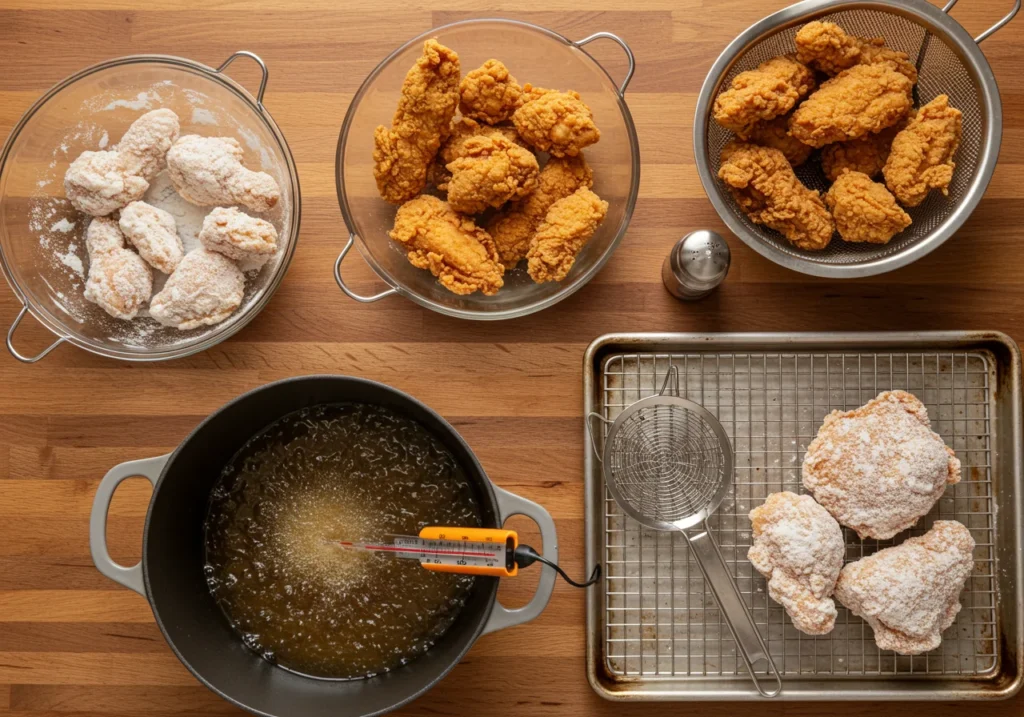
The Fry: Mastering the Hot Oil
Temperature control is everything when learning how to make fried chicken properly.
Choosing the right oil:

- Peanut oil: High smoke point, neutral flavor (my top choice)
- Canola oil: Budget-friendly, good smoke point
- Vegetable oil: Widely available, decent results
You’ll need enough oil to come halfway up your chicken pieces – usually 4-6 cups in a Dutch oven.
Equipment essentials:
- Heavy-bottomed pot or cast-iron skillet
- Candy or oil thermometer
- Wire cooling rack
- Tongs or spider strainer
The perfect temperature: 325-350°F. Any hotter and your coating burns before the meat cooks through. Any cooler and you get greasy, soggy chicken.
Frying in batches is crucial. Overcrowding drops the oil temperature and leads to uneven cooking. I typically fry 3-4 pieces at a time.
How to know when it’s done:
- Internal temperature reaches 165°F
- Juices run clear when pierced
- Coating is deep golden brown
- It sounds less active in the oil
The Ultimate Crispy Fried Chicken Recipe
Print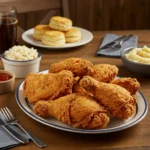
fried chicken recipe
- Total Time: 50 minutes (active time)
- Yield: 6–8 pieces (serves 4–6 people) 1x
Description
This is the ultimate crispy fried chicken recipe that delivers restaurant-quality results at home. Featuring a buttermilk brine for incredibly juicy meat and a perfectly seasoned double-dredged coating for maximum crunch, this foolproof method produces golden-brown fried chicken with a crispy exterior and tender, flavorful interior every time.
Ingredients
Scale
For the Buttermilk Brine:
- 4 cups buttermilk
- 1/4 cup kosher salt
- 2 tablespoons brown sugar
- 2 teaspoons paprika
- 1 teaspoon garlic powder
- 1 teaspoon onion powder
- 1/2 teaspoon cayenne pepper
For the Chicken:
- 3–4 lbs mixed chicken pieces (thighs, drumsticks, wings, breasts)
For the Seasoned Flour Coating:
- 2 cups all-purpose flour
- 1/4 cup cornstarch
- 1 tablespoon kosher salt
- 1 tablespoon paprika
- 1 teaspoon garlic powder
- 1 teaspoon onion powder
- 1 teaspoon black pepper
- 1/2 teaspoon cayenne pepper
- 1/2 teaspoon baking powder
For Frying:
- 6–8 cups peanut oil (or vegetable oil)
Instructions
- Prepare the brine: In a large bowl, whisk together buttermilk, kosher salt, brown sugar, paprika, garlic powder, onion powder, and cayenne pepper until well combined.
- Brine the chicken: Add chicken pieces to the buttermilk brine, ensuring all pieces are fully submerged. Cover and refrigerate for 4-24 hours (longer is better for maximum flavor and tenderness).
- Prepare coating: In a shallow dish, whisk together flour, cornstarch, salt, paprika, garlic powder, onion powder, black pepper, cayenne pepper, and baking powder.
- Set up frying station: Remove chicken from refrigerator 30 minutes before frying. Set up a wire cooling rack over a baking sheet. Heat oil in a heavy Dutch oven to 325-350°F using a candy thermometer.
- Double-dredge the chicken: Working with one piece at a time, remove chicken from brine and coat thoroughly in seasoned flour. Dip back into the brine, then coat again in flour, pressing gently to adhere. Place on wire rack and let rest 5 minutes.
- Fry in batches: Carefully lower 3-4 pieces into hot oil (don’t overcrowd). Fry for 12-15 minutes, turning once halfway through, until internal temperature reaches 165°F and coating is deep golden brown.
- Drain and rest: Transfer fried chicken to clean wire rack and let rest 5 minutes before serving to maintain crispiness.
Notes
- Brine time matters: For best results, brine chicken for at least 4 hours, but overnight (24 hours) is ideal
- Temperature control: Maintain oil temperature between 325-350°F for perfectly crispy, non-greasy results
- Don’t skip the double-dredge: This technique creates the signature craggy, extra-crispy coating
- Resting is crucial: Let dredged chicken rest before frying and let fried chicken rest after cooking for optimal texture
- Oil safety: Use enough oil so chicken pieces are half-submerged and never leave hot oil unattended
- Storage: Store leftover fried chicken in refrigerator up to 3 days. Reheat in 375°F oven for 10-15 minutes to restore crispiness
- Prep Time: 30 minutes (active) + 4-24 hours brining
- Cook Time: 20-25 minutes
- Category: Main Dish, Dinner
- Method: Deep Frying
- Cuisine: Southern American
Nutrition
- Serving Size: 1 piece (4 oz)
- Calories: 485
- Sugar: 4g
- Sodium: 720mg
- Fat: 28g
- Saturated Fat: 8g
- Unsaturated Fat: 18g
- Trans Fat: 0g
- Carbohydrates: 18g
- Fiber: 1g
- Protein: 42g
- Cholesterol: 135mg
Keywords: fried chicken recipe, crispy fried chicken, buttermilk fried chicken, southern fried chicken, homemade fried chicken, easy fried chicken recipe, how to make fried chicken, best fried chicken recipe, double dredged fried chicken, crispy chicken coating
Troubleshooting Common Fried Chicken Fails
“My breading fell off!”
This usually happens when the chicken is too wet or the oil isn’t hot enough. Make sure to let dredged pieces rest before frying, and always check your oil temperature.
“My chicken is greasy, not crispy!”
Your oil temperature dropped too low, or you didn’t drain the chicken properly. Maintain 325-350°F and always rest on a wire rack, never paper towels.
“It’s burnt outside but raw inside!”
Oil too hot! Lower the temperature and be patient. Good fried chicken can’t be rushed.
Beyond the Basics: Fried Chicken Variations
Spicy fried chicken: Add extra cayenne to your brine and dredge, or toss finished chicken in hot sauce mixed with melted butter.
Gluten-free option: Replace all-purpose flour with a blend of rice flour and cornstarch (2:1 ratio). Results are surprisingly good!
Oven-fried alternative: Bake breaded chicken at 425°F on a wire rack, flipping once. Not quite the same, but it’s healthier and still delicious.
Perfect Pairings and Leftovers
Classic sides that never disappoint:
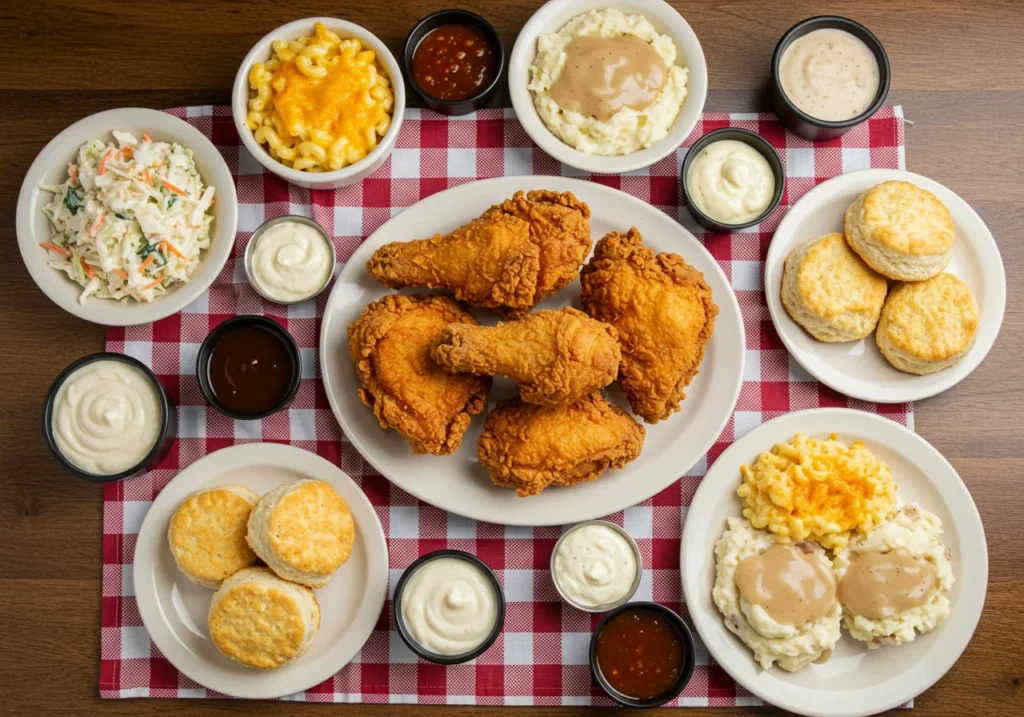
- Creamy coleslaw
- Buttermilk biscuits
- Mac and cheese
- Mashed potatoes with gravy
Dipping sauce ideas:
- Honey-sriracha glaze
- Alabama white sauce
- Classic brown gravy
- Hot sauce and butter
Storing leftovers: Refrigerate up to 3 days. Reheat in a 375°F oven for 10-15 minutes to restore crispiness. Skip the microwave – it makes everything soggy!
Your Fried Chicken Journey Starts Now
There you have it – everything you need to master the perfect fried chicken recipe! Remember, great fried chicken is about patience, technique, and not being afraid to get a little messy in the kitchen.
The key takeaways? Brine for juicy meat, double-dredge for maximum crunch, maintain proper oil temperature, and don’t rush the process. Master these fundamentals, and you’ll be serving up restaurant-quality fried chicken that’ll become the stuff of family legend.
Now stop reading and start frying! Your kitchen (and your taste buds) will thank you.
What’s your biggest fried chicken challenge? Drop a comment below and let’s solve it together!